Do you still forget to collect reviews after purchase? If yes, you’re leaving money on the table.
95% of people read online reviews before buying a product. Of those, 88% say an online review influenced their buying decisions.
Enough reason to start collecting customer reviews for your brand. Right?
But here’s the catch — only 5-10% of all customers actually write reviews online.
With only a measly percentage of customers interested in leaving a review, how do you grow your online reputation?
Don’t worry; we’ve got you covered.
Read on to learn how to automate the review collection process through low-effort automations.
Why Are Customer Reviews Important?
No one can deny that we’re all influenced by what we see online—be it on social media or review websites. In fact, online reviews and content impact our opinions and buying decisions.
Reviews are amazing social proof, and here are three reasons you should care about them as a business owner:
- Reviews increase conversions. People look for social proof online, and having more reviews can increase conversion rates by 4.6% for your online store;
- Reviews boost SEO. User-generated content (like reviews) boosts your organic visibility as search engines take these into consideration and favor the websites with reviews;
- Reviews build trust. Shoppers trust other people’s experiences when buying something. They instantly create a human connection, which increases your goodwill and trustworthiness.
We all get it—reviews are super important, but how can we ask customers to leave reviews without appearing desperate? The best way to do so is to automate the process using customer feedback tools.
Step-by-Step Guide for Collecting Reviews
Imagine how good it would be if you’d never had to ask for a review. Instead, your customers are prompted to leave one at various steps in their buyer’s journey. Here’s how you can automate sending review requests and increase your online reputation:
Step 1. Choose Customer Feedback Tool
You’ll need a customer feedback tool to create a review form. Your customers can fill the form after they’ve purchased something from you.
Here are the top tools you can use to gather customer feedback.
- forms.app is an online form builder for creating forms, collecting form submissions, and automating workflows.
- Typeform is an interactive survey builder that replaces the wall of questions we all associate with feedback forms with an intuitive interface that asks one question at a time.
- Jotform is a user-friendly survey tool that helps users create forms online without any coding involved.
- Google Forms is a free and intuitive form builder that syncs effortlessly with Google Sheets to capture and record customer feedback.
- Outgrow offers simple, no-code tools to acquire qualified leads with engaging quizzes, calculators and forms.
Let’s pick Google Forms as our feedback tool for this tutorial.
Explore survey tools and other seamless Sender integration with Zapier:
Step 2. Create a Feedback Form
Create a survey or feedback form in Google Forms. Go to forms.google.com and start by creating a blank form.
Include fields such as name, phone number, email, rating (1-5 stars), and review text. Here’s a simple review form you can replicate:
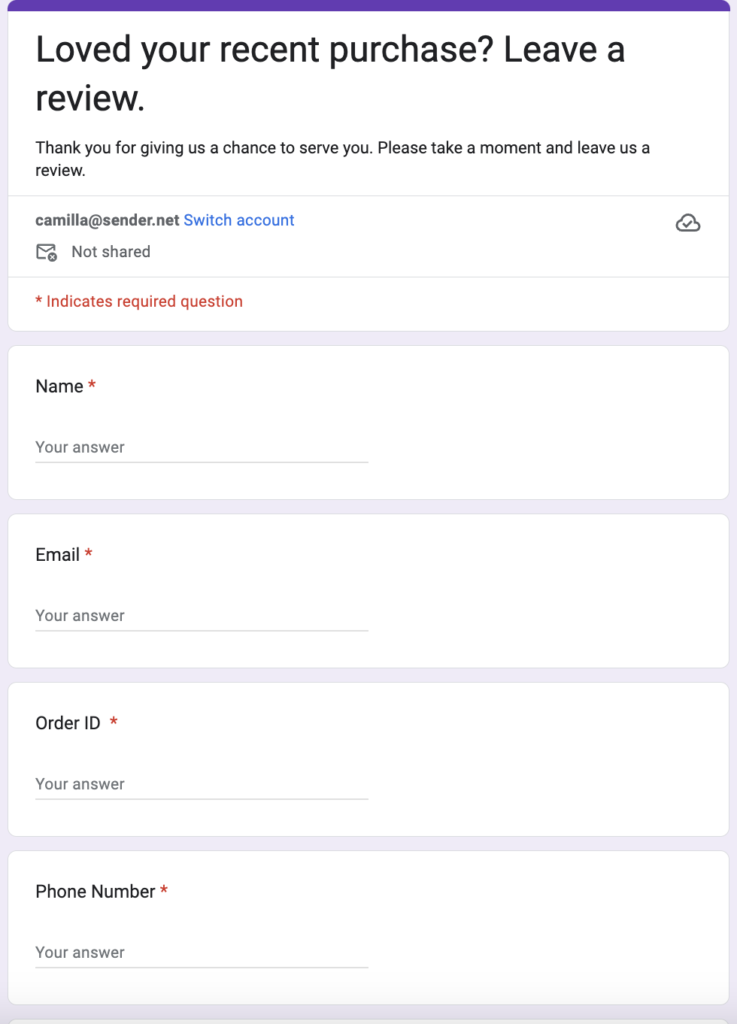
Copy your form link for the next step.
Step 3. Send Your Feedback Form to Your Subscribers
Now, you’ll need an email marketing tool to send this feedback form to all your subscribers or past buyers.
Create and send (or schedule) a good-looking review request email with Sender. Look how simple it is:
- Go to email campaigns on the Sender dashboard and create a new campaign.
- Add the campaign details: subject line, preview text, ‘from name’, and email address. Then, choose drag-and-drop builder to start creating the email.
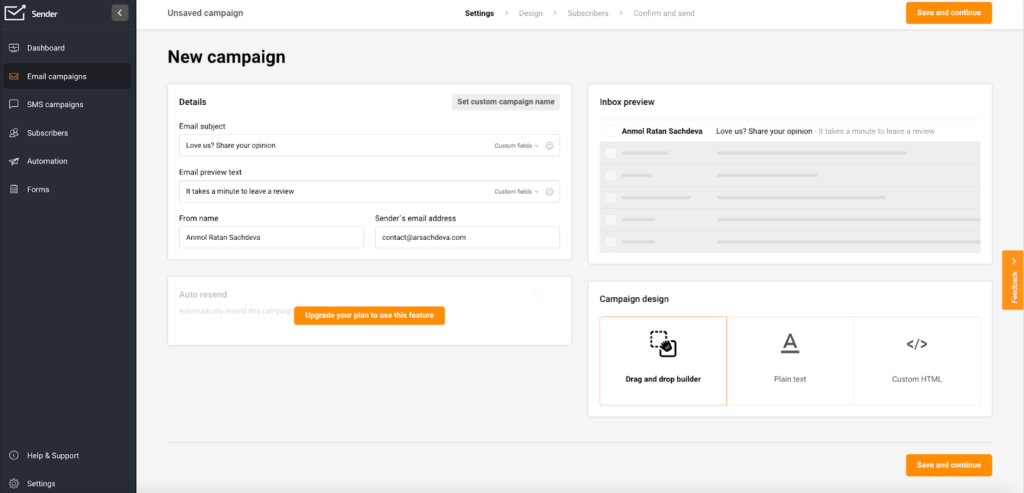
- To save time and create an email without any hassle, we recommend choosing one of many free templates.
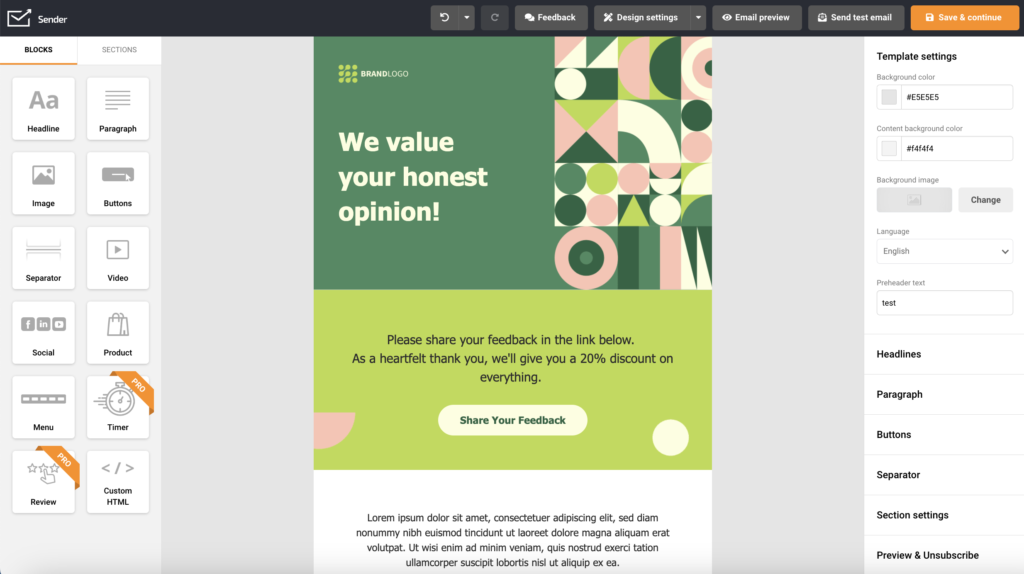
- Adjust the template content to your liking and link your feedback form to the CTA button.
- Once you’re happy with your email, click on Save and Continue to send it to your customers
Step 4. Send All Form Submitters to Sender
Once you’ve sent the email, you must segment the subscribers who’ve submitted a review. This will help you send the discount code after someone has left a review.
In order to automate this process, you need to use Zapier, which integrates your feedback form tool with Sender.
Pick this Zap (or if you use Typeform or Jotform, pick their zaps) that will automatically update subscribers from your list based on form submissions on your feedback form.
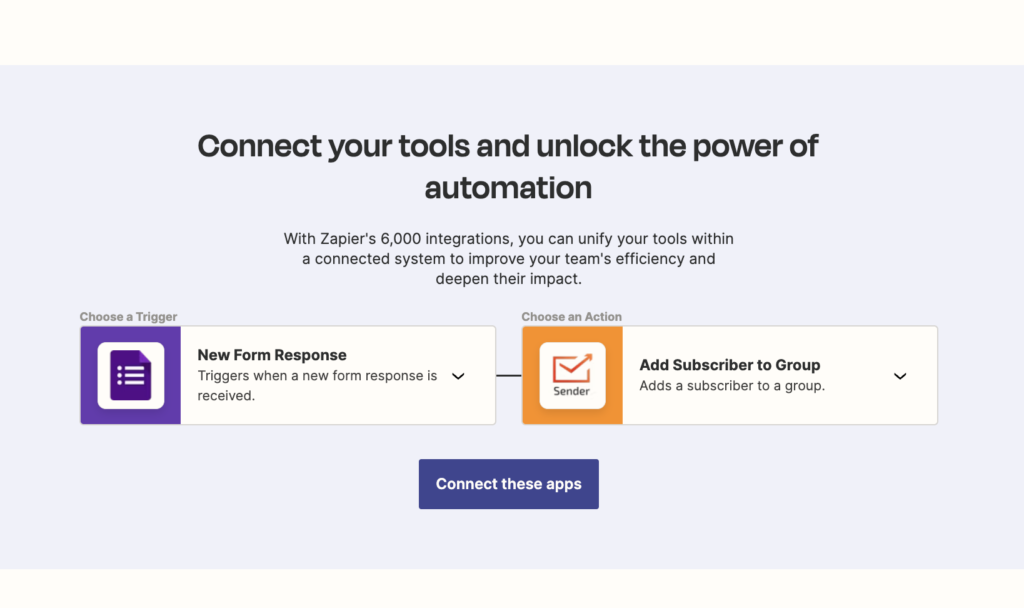
- Select your form response as the trigger when configuring the Zap.
- Add all submissions (emails) to a separate group to create a new segment of subscribers who’ve left a review. Map different fields to each subscriber, such as their name, email, etc., which will help with personalization.
Step 5. Set Up an Automated Thank You Email
Now, everyone who fills out the form will be added to a separate group/segment in your dashboard.
Automate the delivery of the incentive (discount code) mentioned in your feedback request email using Sender’s automation builder. To set up an automated email, follow these steps:
- Create a new automation workflow;
- Pick ‘Subscriber joins a group’ as your automation trigger.
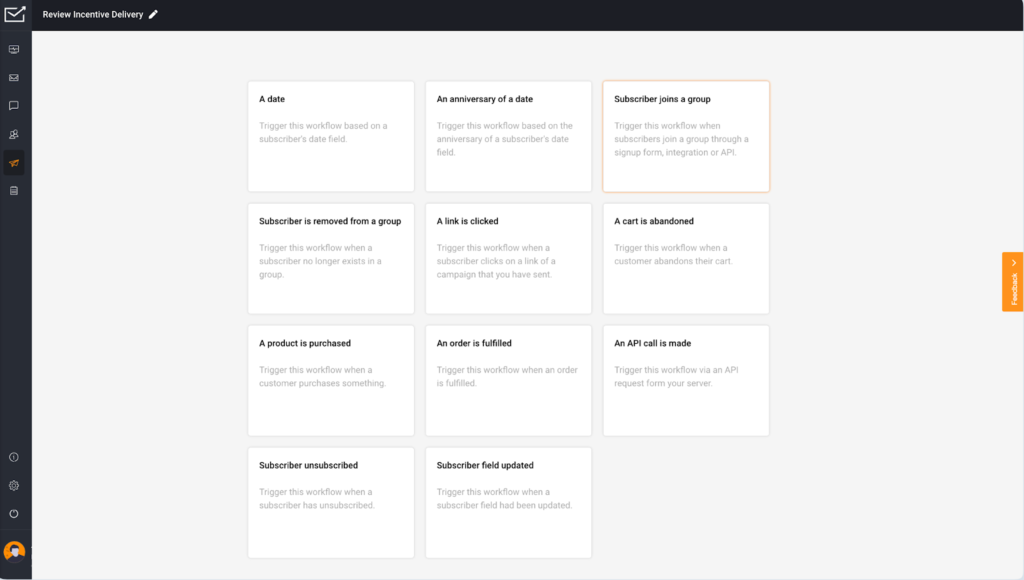
- Add the email with a coupon code or discount voucher. Your automation flow would look like this.
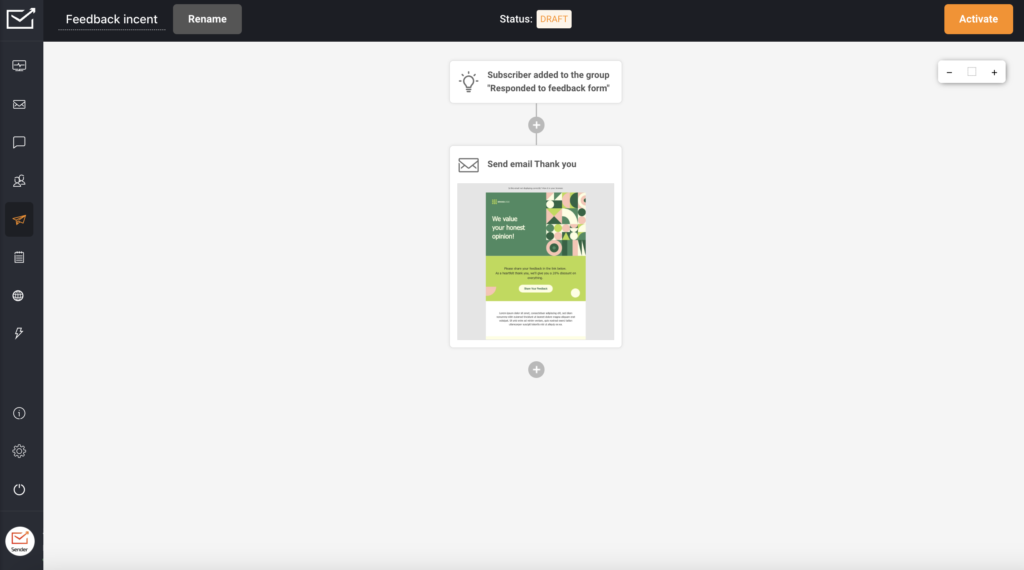
- Design the email using the drag-and-drop builder, as you’ve done with the survey email.
- Once you’re happy with your email design and have defined its elements like subject line, preview text, etc., activate the automation.
Bonus: Send Surveys to All Future Customers
You can also set up an automation that sends your feedback email every time an order is complete. Here’s how you can set it up using Zapier and Sender:
Step 1. Create an Automation Workflow
Pick ‘Subscriber joins a group’ as your automation trigger.
Step 2. Add an Email Action
Add a new action —> Email to start creating a feedback email using the drag-and-drop builder, like you created in the previous section, for incentive email.
Step 3. Automate Emails with an Offer or Discount Code
Automate delivery of discount code/offer by following the steps mentioned in step 5 in the previous section using Zapier & Sender.
There you have it, reviews are extremely powerful tool for your business. And the good thing is that you can easily set up the automation to keep them coming your way. Good luck!

