


Email marketing remains unbeatable in driving attendee registrations, boosting engagement, and ultimately, ensuring a packed house (virtual or real).
However, manually managing email campaigns alongside the event planning tasks can be overwhelming.
This is where automation comes in. Using tools like Zapier, Sender, and your chosen event platform, you can automate your email marketing, freeing up valuable time and ensuring your message reaches the right people at the right time.
Let’s see how!
Benefits of Email Marketing for Events
Email marketing offers a direct line to your audience, allowing you to build excitement, share event details, and cultivate relationships beyond the event itself.
Here’s why it’s a must-have for your event marketing strategy:
- Targeted communication. Segment your audience based on interests, behavior, or registration status to deliver personalized messages that resonate;
- Increased engagement. Send timely reminders, updates, and exclusive content to keep attendees engaged and informed throughout the event lifecycle;
- More registrations. Use automated email sequences to nurture leads, answer questions, and encourage sign-ups;
- Valuable feedback. Gather insightful feedback post-event to understand attendee satisfaction and improve future events.
And the best part? With email automation, it can all happen even if you’re off the clock. Let’s see how you can automate your event marketing using Zapier (hint: it’s super easy and quick).
Tutorial: How Do You Automate Emails for Your Event Marketing?
Here’s a step-by-step guide to transforming your event email marketing with automation:
Step 1. Pick Your Event Management Software
First, you need an event platform that integrates seamlessly with your marketing tools. Here are a few popular options:
- Eventbrite. A popular choice for ticketing and registration, Eventbrite simplifies event management and provides valuable attendee data;
- Cvent. Designed for conferences and trade shows, Cvent offers a suite of tools for event planning, marketing, and onsite management.
Did you know that Sender integrates directly with many other tools using Zapier?
Explore different solutions you can connect to Sender’s now.
Step 2. Choose a Trigger
Zapier bridges your event platform and your email marketing software (in this case, Sender). It allows you to trigger specific actions in Sender based on events happening within your chosen event platform.
Let’s say you’re using Eventbrite and want to send an email sequence automatically when someone registers for your webinar (that’s your trigger).
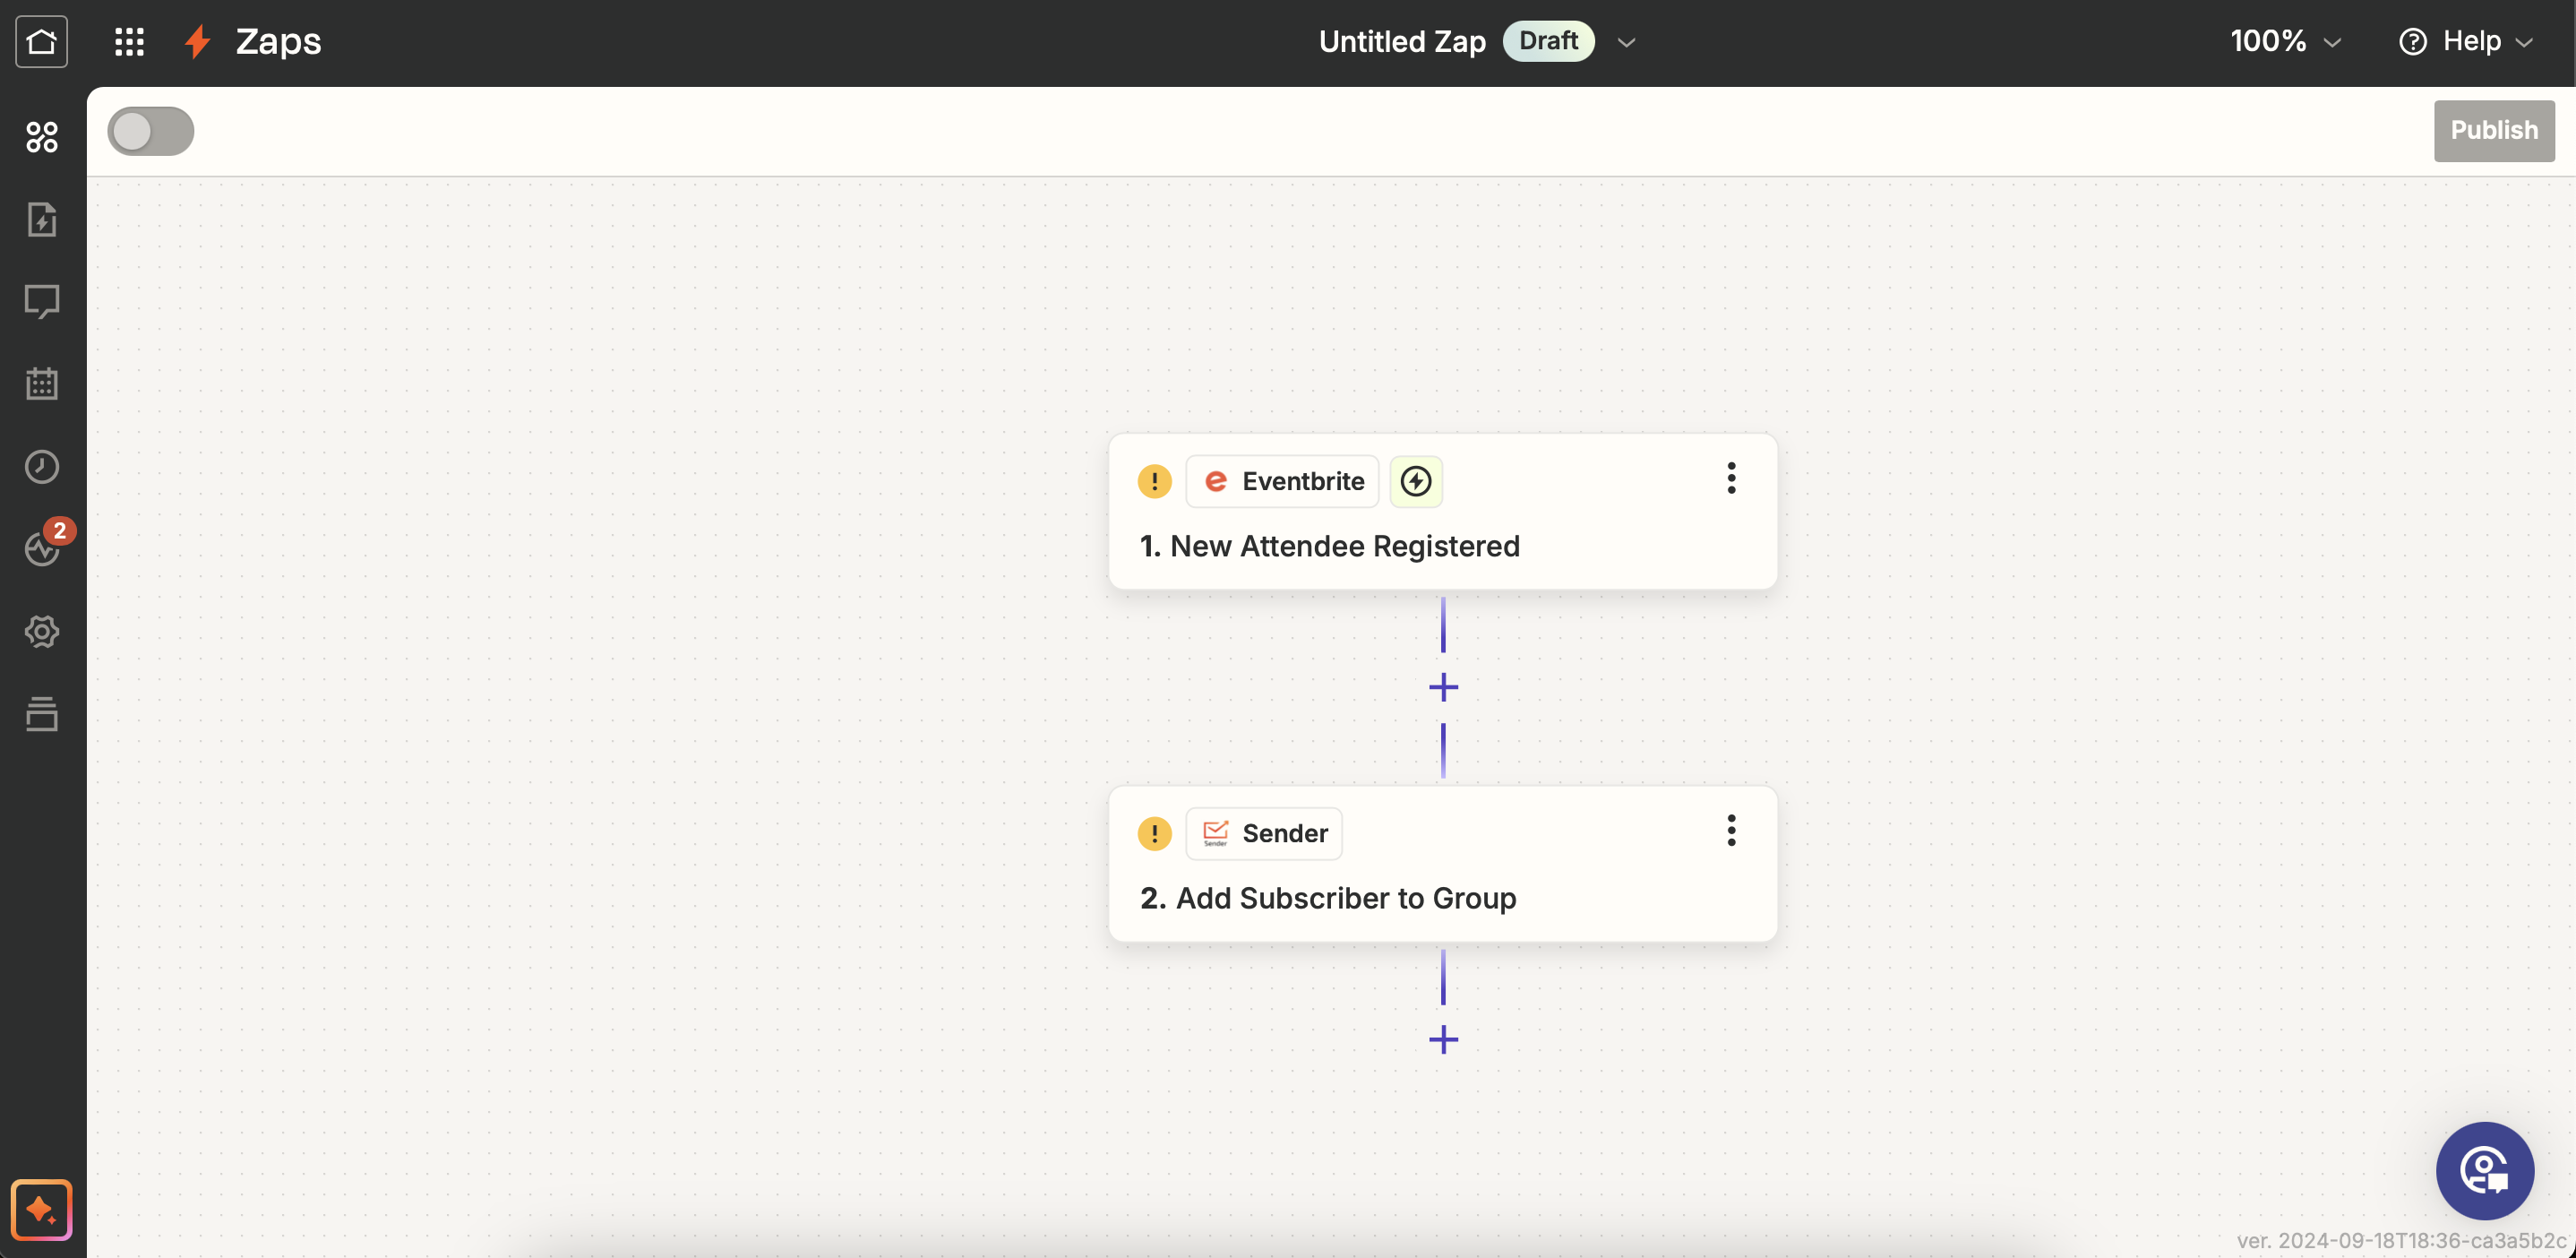
Here’s how to set up this trigger:
- Sign up for Zapier and connect your Eventbrite and Sender accounts;
- Click to create a new zap – an automated workflow in Zapier;
- Choose Eventbrite as your trigger app and select “New Attendee Registered” as the trigger event;
- Choose Sender as your action app and select “Add Subscriber to a Group” as the action;
- Map the relevant attendee information (name, email, etc.) from Eventbrite to the corresponding fields in Sender;
- Test the workflow to ensure it works.
Step 3. Craft Your Emails
Now, you can effortlessly create dedicated webinar email sequences directly within Sender. Building engaging, responsive email is a breeze with the intuitive drag-and-drop builder.
Here’s how to get started:
- Head to “Email Campaigns” and click “New campaign.”
- Give it a descriptive name (e.g., “Webinar Registration Confirmation”) so that it is easy to identify when setting up your automated workflow.
- Craft a compelling subject line and preview text.
- Choose from various professionally designed templates that align with your marketing goals.
- Use the drag-and-drop builder to add, remove, and customize content blocks.
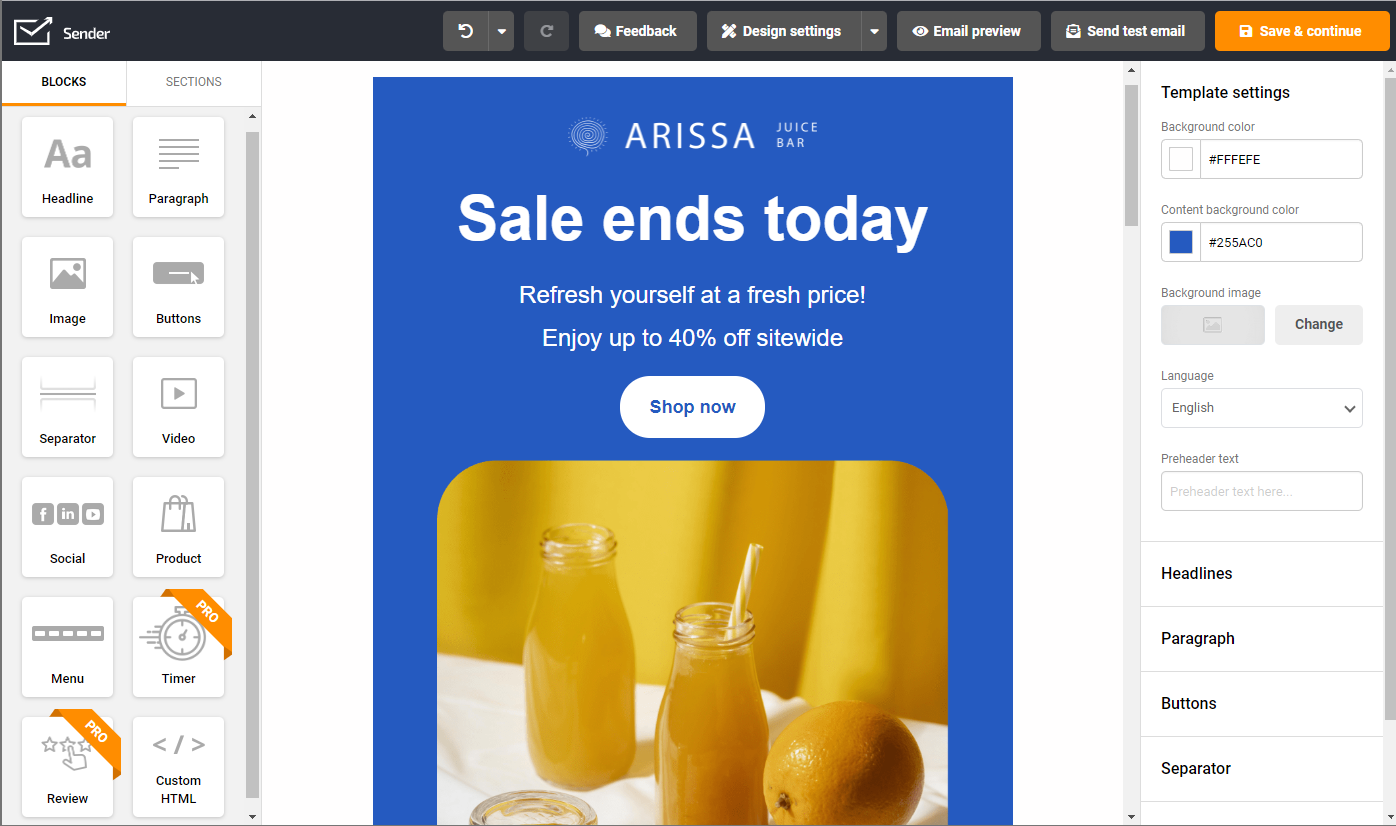
- Once you’re happy with your design, save your email as a template to integrate seamlessly into your automated workflow.
Note: You can create an email in advance and save it as a template, as we explained in this step, or create the email when setting up the automation (Step 4).
Step 4. Set Up Automation
Create an automated webinar workflow in Sender’s visual automation builder. Once it’s activated, whenever someone registers for your webinar on Eventbrite, they will automatically be added to your Sender subscriber list and receive your pre-crafted email sequence.
Here’s how to set up automation:
- Create a dedicated subscriber group beforehand to add webinar registrants automatically.
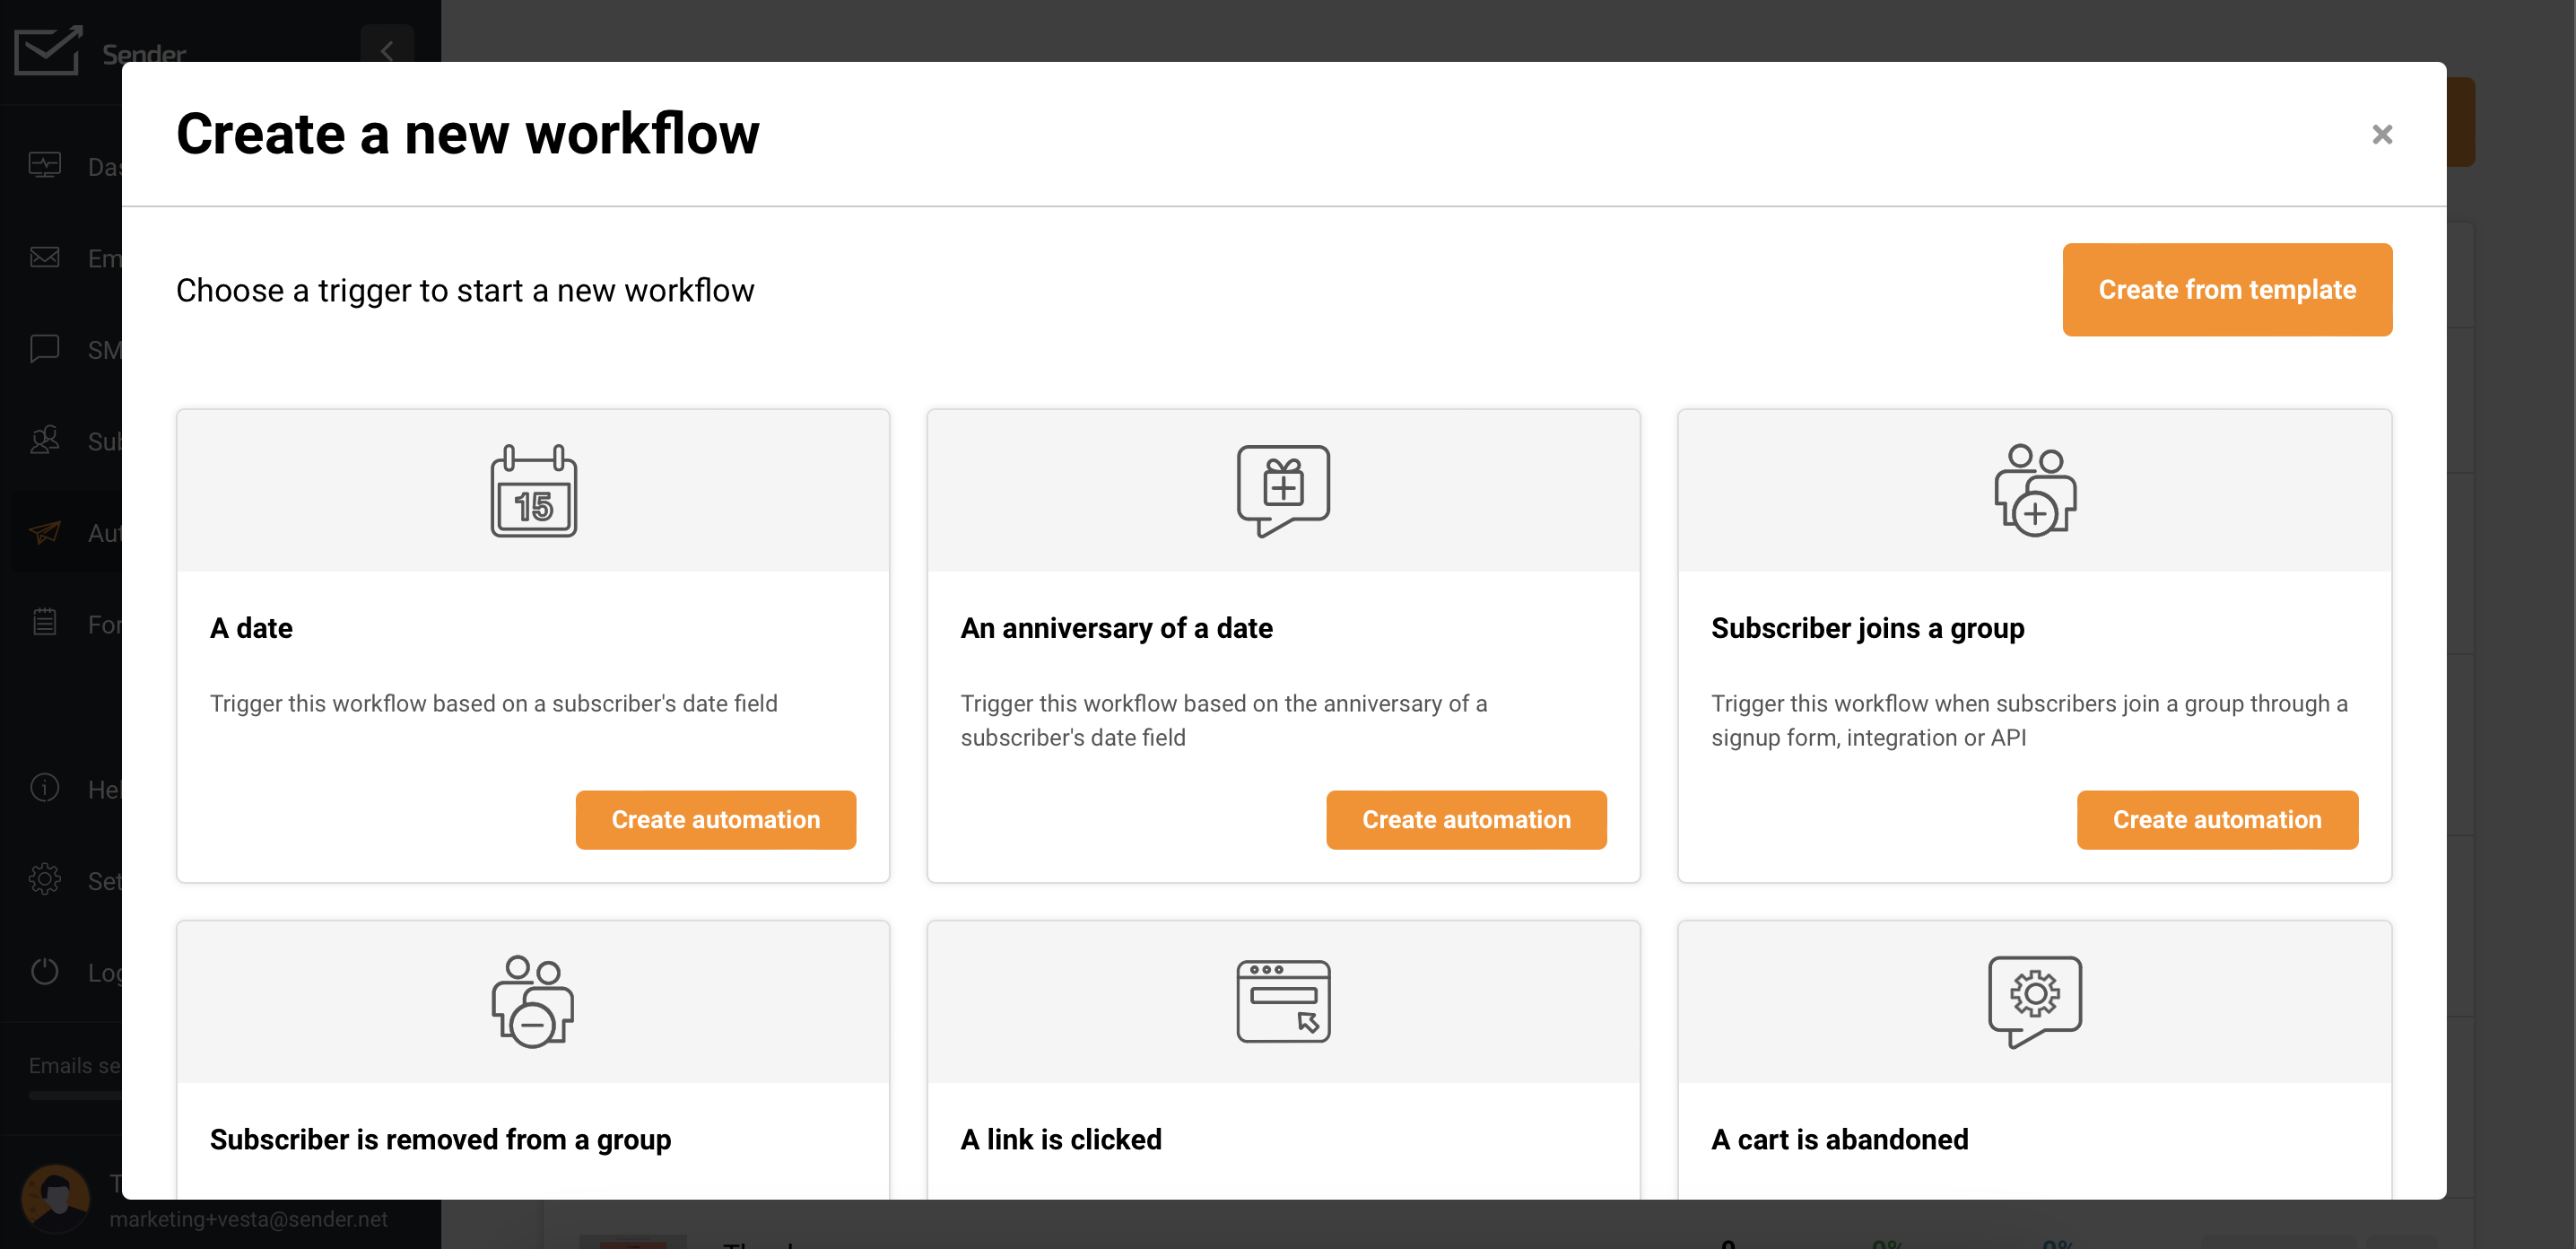
- Click to create a new workflow and pick ‘Subscriber joins a group’ as your automation trigger.
- Add an email step in the visual automation builder to send a confirmation email when someone joins the group (registers for your webinar).
- Create this email using the drag-and-drop builder or select the saved email template (if you’ve followed step 3).
- Add a delay step.

- Add another email action to set up the second email in the webinar series.
- Keep adding as many automated emails as you need.
- Once you’re happy, activate the automation.
Every time a subscriber joins a webinar attendees group, it automatically triggers a confirmation email, followed by another email in the sequence after a set time.
Et voilà! You’ve successfully set up an automatic system that saves you time and starts engaging and informing registered attendees when they save a spot at your webinar.
Recommended Webinar Email Sequence
Need help planning your webinar email sequence? We’ve created a handy workflow recommendation to guide you:
- Confirmation email (immediately after registration):
- Confirms registration, provides essential details (date, time, link), and builds excitement.
- Content: Thanks for registering, webinar details, and calendar invite.
- Speaker introduction email (1 week prior):
- Introduces the speakers, highlights their expertise, and increases anticipation.
- Content: Speaker bios, photos, teasers about the topic, and prep material.
- Agenda email (1 day prior):
- Provides a detailed outline of the webinar content, reinforcing value and preparing attendees.
- Content: Schedule and benefits reminder.
- Final reminder email (1-2 hours prior):
- This is a last-minute reminder to join the webinar and reduce no-shows.
- Content: Webinar link, start time, Q&A session information, and any urgent instructions.
- Feedback email (immediately after):
- Collects feedback to improve future webinars.
- Content: Short survey link, thank you message, and an invitation to the next event.
- Webinar summary email (2-3 days after):
- Provides key takeaways, resources, and follow-up actions for attendees and absentees.
- Content: Webinar recording link, slides, highlights, and an invitation to the next event.