How many websites have you surfed which served you with a pop-up during your visit?
Or I guess I should ask how many websites haven’t?
Almost every other professional website uses pop-ups to get leads and build up their email lists. You as a marketer or website developer might not opt-in for most of the pop-ups, but this is not the case with most of the website visitors.
In fact, pop-ups are one of the most effective marketing ways for websites. An interesting study done by Sumo.com on 2 Billion pop-up examples showed that the top 10% of the websites had a conversion rate of 9.28%.
Now, the tricky part is creating a pop-up for your website. While using plugins significantly reduces website speed, web developers and marketers look for ways to make one without a plugin.
In this post, we discover an interesting and the easiest way to build a pop-up within minutes without any knowledge or plugin.
How to create a pop-up in WordPress or other system?
After you log in to Sender, you will be redirected to the dashboard where you can control everything.
To start building your first pop-up, click on “Forms” on the left menu and then click on “Create a new popup” on the top right section.
You will get to see a pop-up saying name your form where you can enter any name which will help you select it afterwards when you wish to make some changes or get data.
After you name your form, you will get to see three options –
- Embedded form.
- Pop-up form.
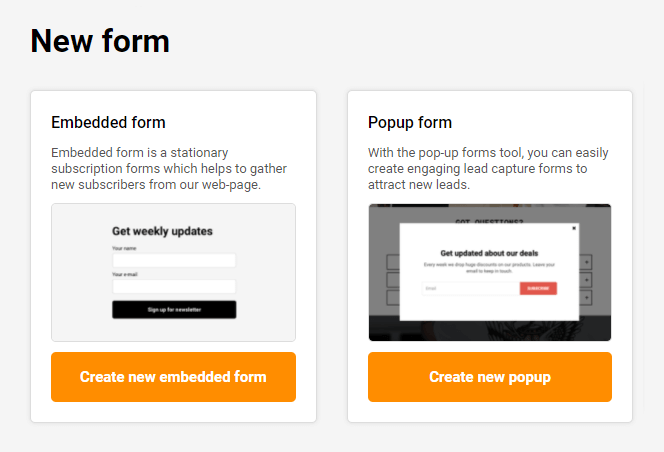
Sender.net allows you to create all these using their service, but for this example, we will be selecting a pop-up form.
Select Popup template
Now, you will get to see a pop-up with the heading “Pop-up Layouts” with the following options:
- Subscribe.
- Treat yo self.
- Love surfing?
- Art gallery.
- For all things design.
And others.
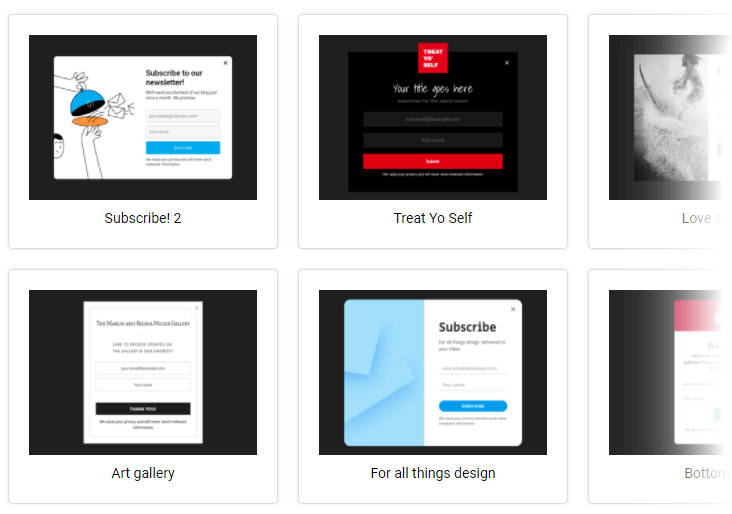
Although Sender.net gives you the options to edit each and every part of popups, there are many pre-made templates which you can use in seconds.
All of these templates are thoughtfully created to engage your audience and convince them into filling out the details. For this example, we are selecting the “Art gallery” option.
Editing and customizing your pop-up
As soon as you select the “Art gallery” option, you are redirected to the editing and customization dashboard.
You will get all the options to change everything in this dashboard.
Let’s discuss and discover all the options that you have.
On the right pane, you will get to see three sections, namely –
- Design.
- Settings.
- Behavior.
The setting section for popup
In the settings section, you can:
✅ Add Re-Captcha to verify if all entries are made by humans and prevent thousands of bogus entries and cyber attacks.

✅ Confirmation checkbox to display an option to ask for “consent to send marketing material.” This option is also required by law for many companies and countries. You can change the text of the confirmation message to your needs.

✅ You can opt for the “Double opt-in” in which the subscribers will have to confirm their subscription by clicking on the link they get in the Email. This is used to verify if the given Email is real or not.
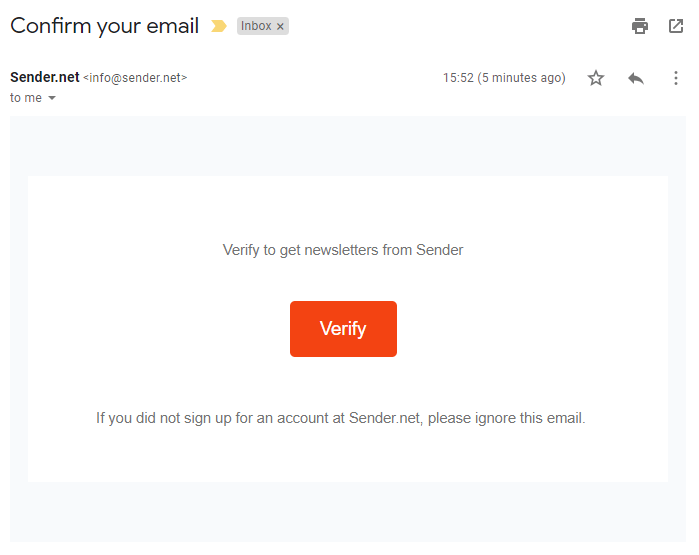
✅ “Redirect after submit” option is used if you wish to redirect the users to a landing page afterwards.
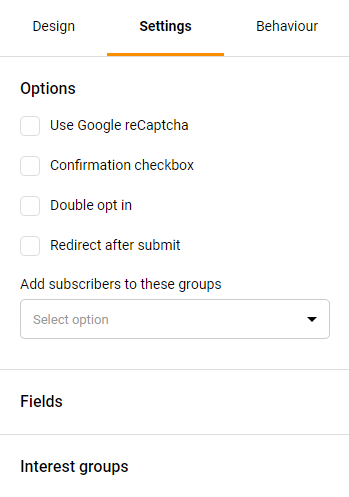
In the fields option, you can create, edit or add custom fields to your opt-in forms on the website. You can create lengthy or one field forms based on the intent of the forms and the industry.
The design section for popup
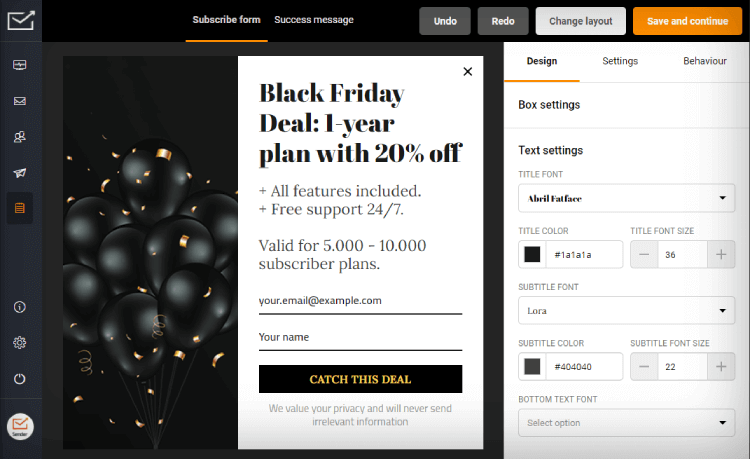
The design section in the right pane gives you all the options to edit and customize the look and feel of the pop-up.
It starts with the box design settings. You can select and change the color of the background and border color of the box along with defining its width and radius.
You can further change and customize settings for:
- Text.
- Input labels.
- Checkbox.
- Button.
- Overlay.
- And even have custom images.
The behavior section for popup
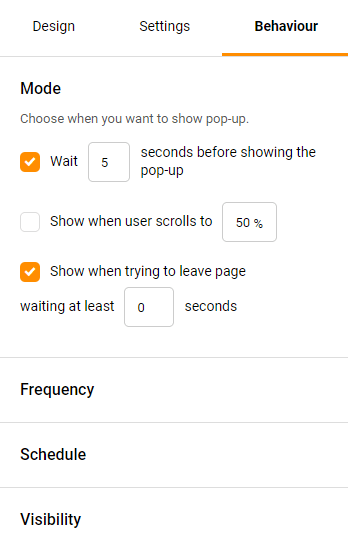
This is by far the best section in which you can enhance user experience. You can define each aspect of how your pop-in form will behave on your website.
Some of the options are:
- You can define the mode in which you can wait for 5 or some particular seconds before the pop-up shows.
Pro tip. We recommend to show up Popup at about 45-50% of the average time on page. You can check this on your Google Analytics account:
Behavior -> Site Content -> Landing Pages

So, in this case Popup will shows after 46 seconds.
- You can show the pop-up when a user has scrolled through a specific percentage of the page.
This is worth to setup if you want the visitor to see a certain % of the content.
- You can also configure the frequency of the pop-up and make it appear multiple times during each visit.
We recommend to setup 2-4 weeks popup frequency.
- You can schedule the pop-up according to set parameters and time.
For example, if you have limited time offer.
The success message after Popup submit
On the middle part of the top bar contains two sections, namely the subscribe form and the success message.
The message that you get after the user subscribes can also be customized to your needs. Just like the main form, you can edit every section of the pop-up.
- Email Marketing for Restaurants: The Definitive Guide
- Email list segmentation: The Definitive Guide
- 11 Best Company Newsletter Ideas to Develop Your Brand
- Free Spin the Wheel Popup — Boost Sales the Fun Way
About author
I am Richard Mullins and love to write on a wider range of topics, such as Technology and the Internet, Software, Marketing, Home Improvement, Home Décor, Automotive, and more. I have years of writing experience in the field. Also working at Leadconnect, outreach automation platform.
