


Did you scratch your head after Gmail and Yahoo announced they require list-unsubscribe headers for all marketing emails? No need to worry; it’s nothing complex, just a way to give your subscribers more control.
Think of it as an ‘emergency exit’ sign in a building.
You need to install it for easy visibility and quick use. Plus, anti-spam laws and compliance require you to simplify unsubscribing as email marketers.
Let’s look at how you can quickly set up a list-unsubscribe header for your email campaigns without wasting time.
This article is part of our Email deliverability guide.
What is a List-Unsubscribe Header?
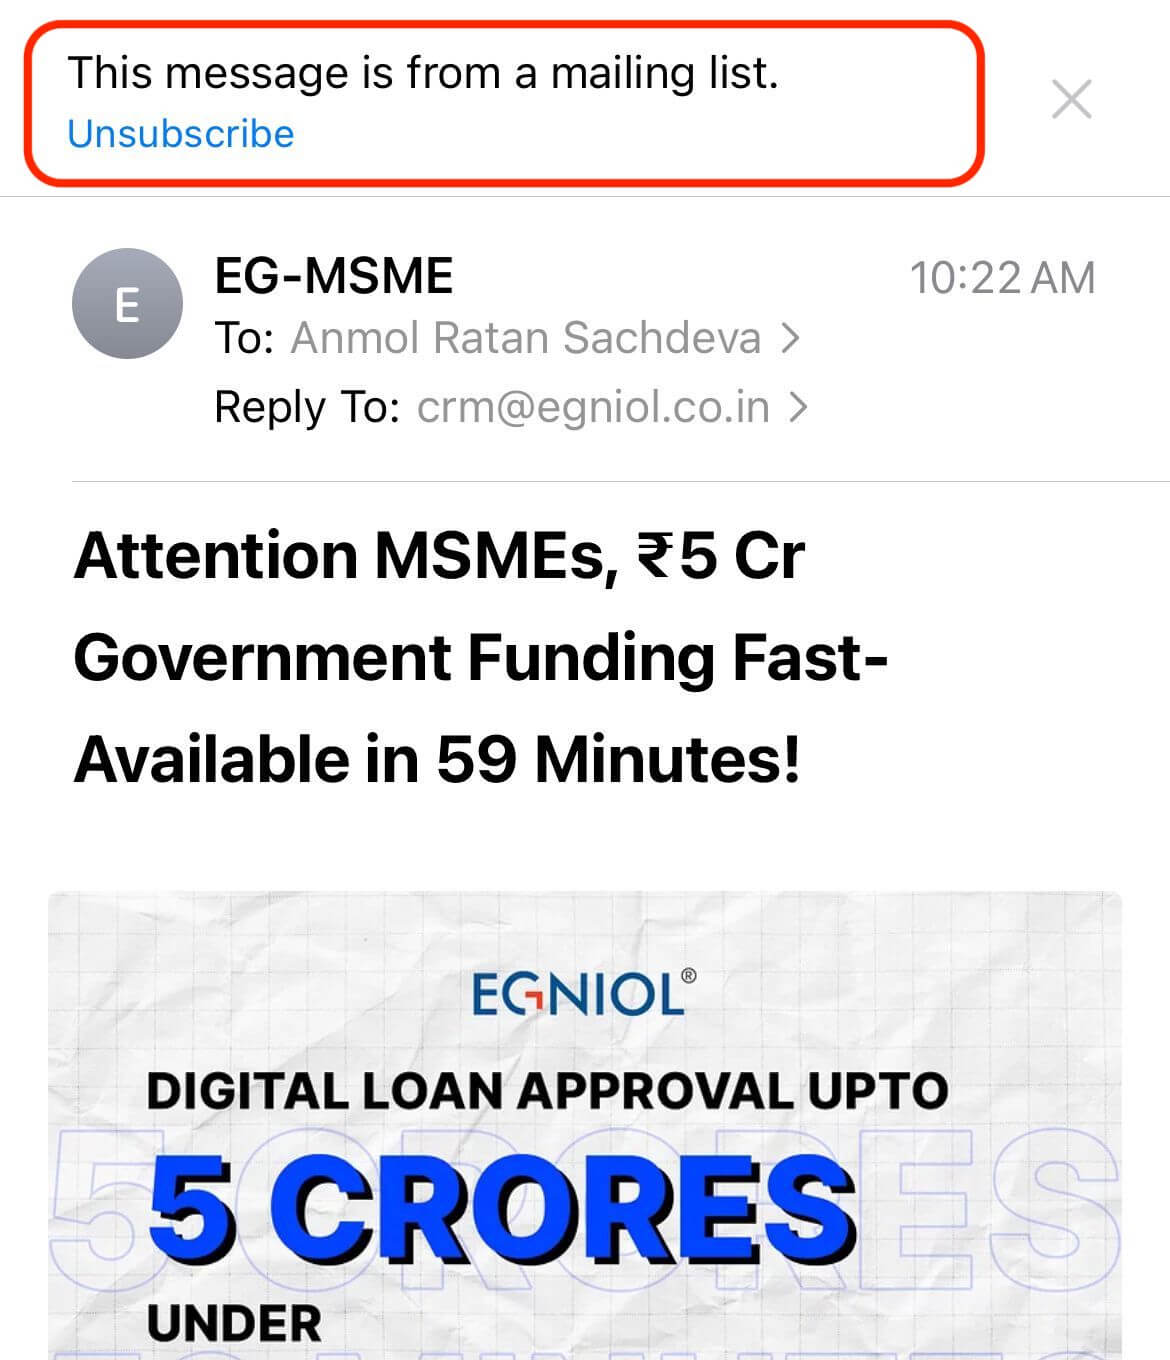
A list-unsubscribe header is a method for subscribers to remove themselves from an email list. It’s at the top of any email, right beside the sender’s details. From a UX standpoint, the header is a good place for an unsubscribe button, as readers don’t have to search through the body.
Here’s what it looks like:
Fundamentally, the list-unsubscribe header is a code to communicate your unsubscribe process to inbox providers like Gmail, iOS, Yahoo, etc. Adding the code enables the native unsubscribe button in the inbox.
Plus, Google & Yahoo made it mandatory to add list-unsubscribe headers for seamless delivery in inboxes. The email infrastructure guide that documents the Gmail and Yahoo bulk-sender rules in full covers the complete requirement table — SPF/DKIM/DMARC alignment, the 0.3% spam complaint threshold, PTR records, and the one-click unsubscribe spec — that this header is one piece of.
How List-Unsubscribe Links Appear in Different Inbox Providers?
Every email client has a different way of showing the list of unsubscribe headers. Here’s how it looks in the most popular email clients:
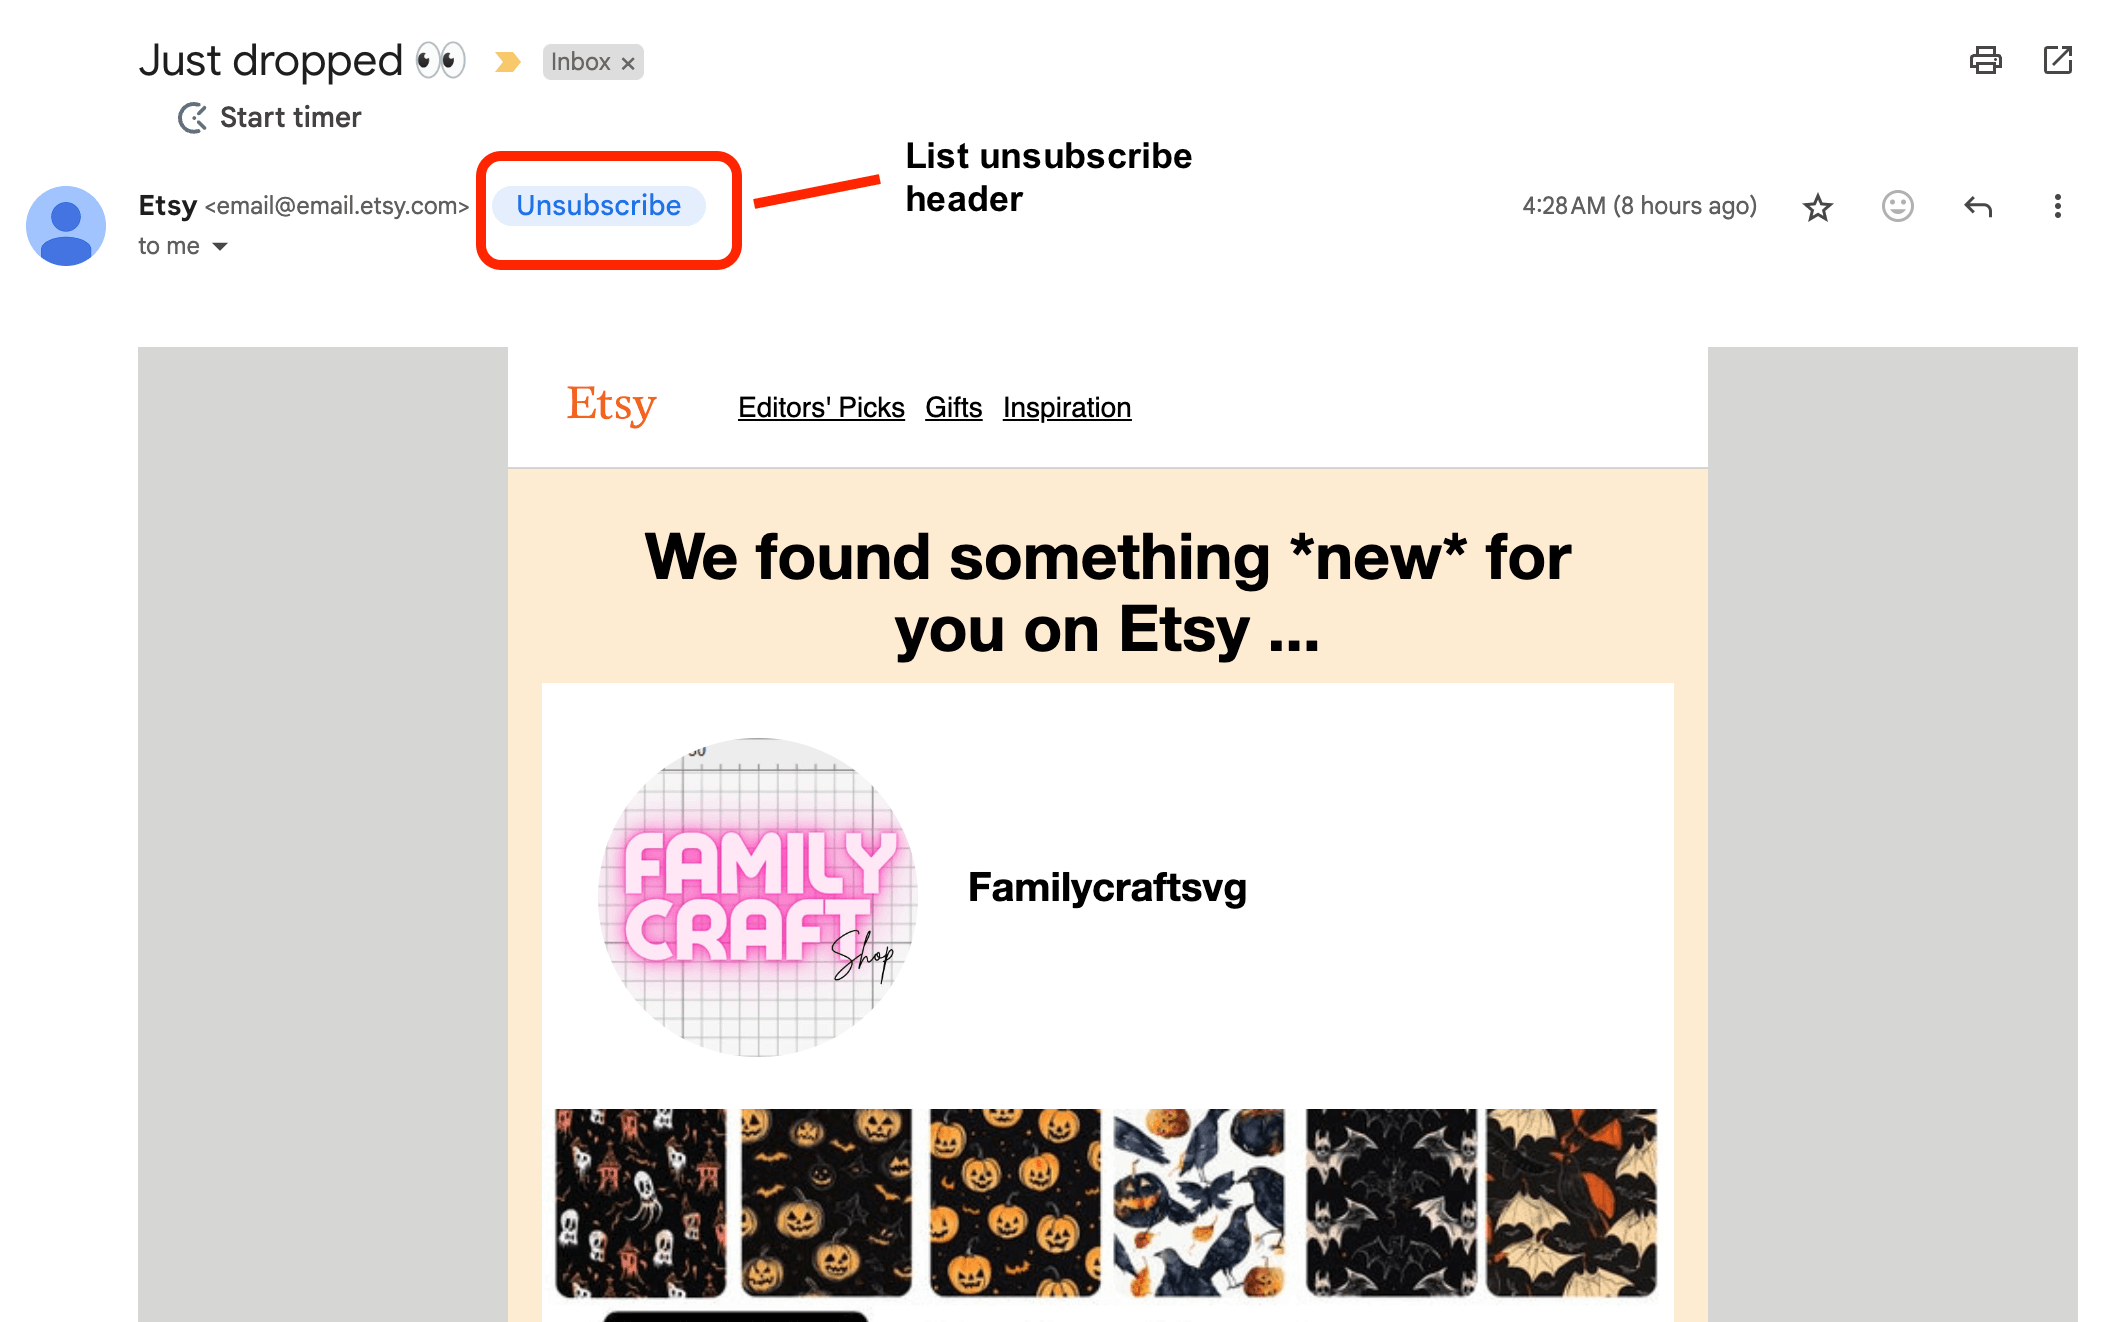
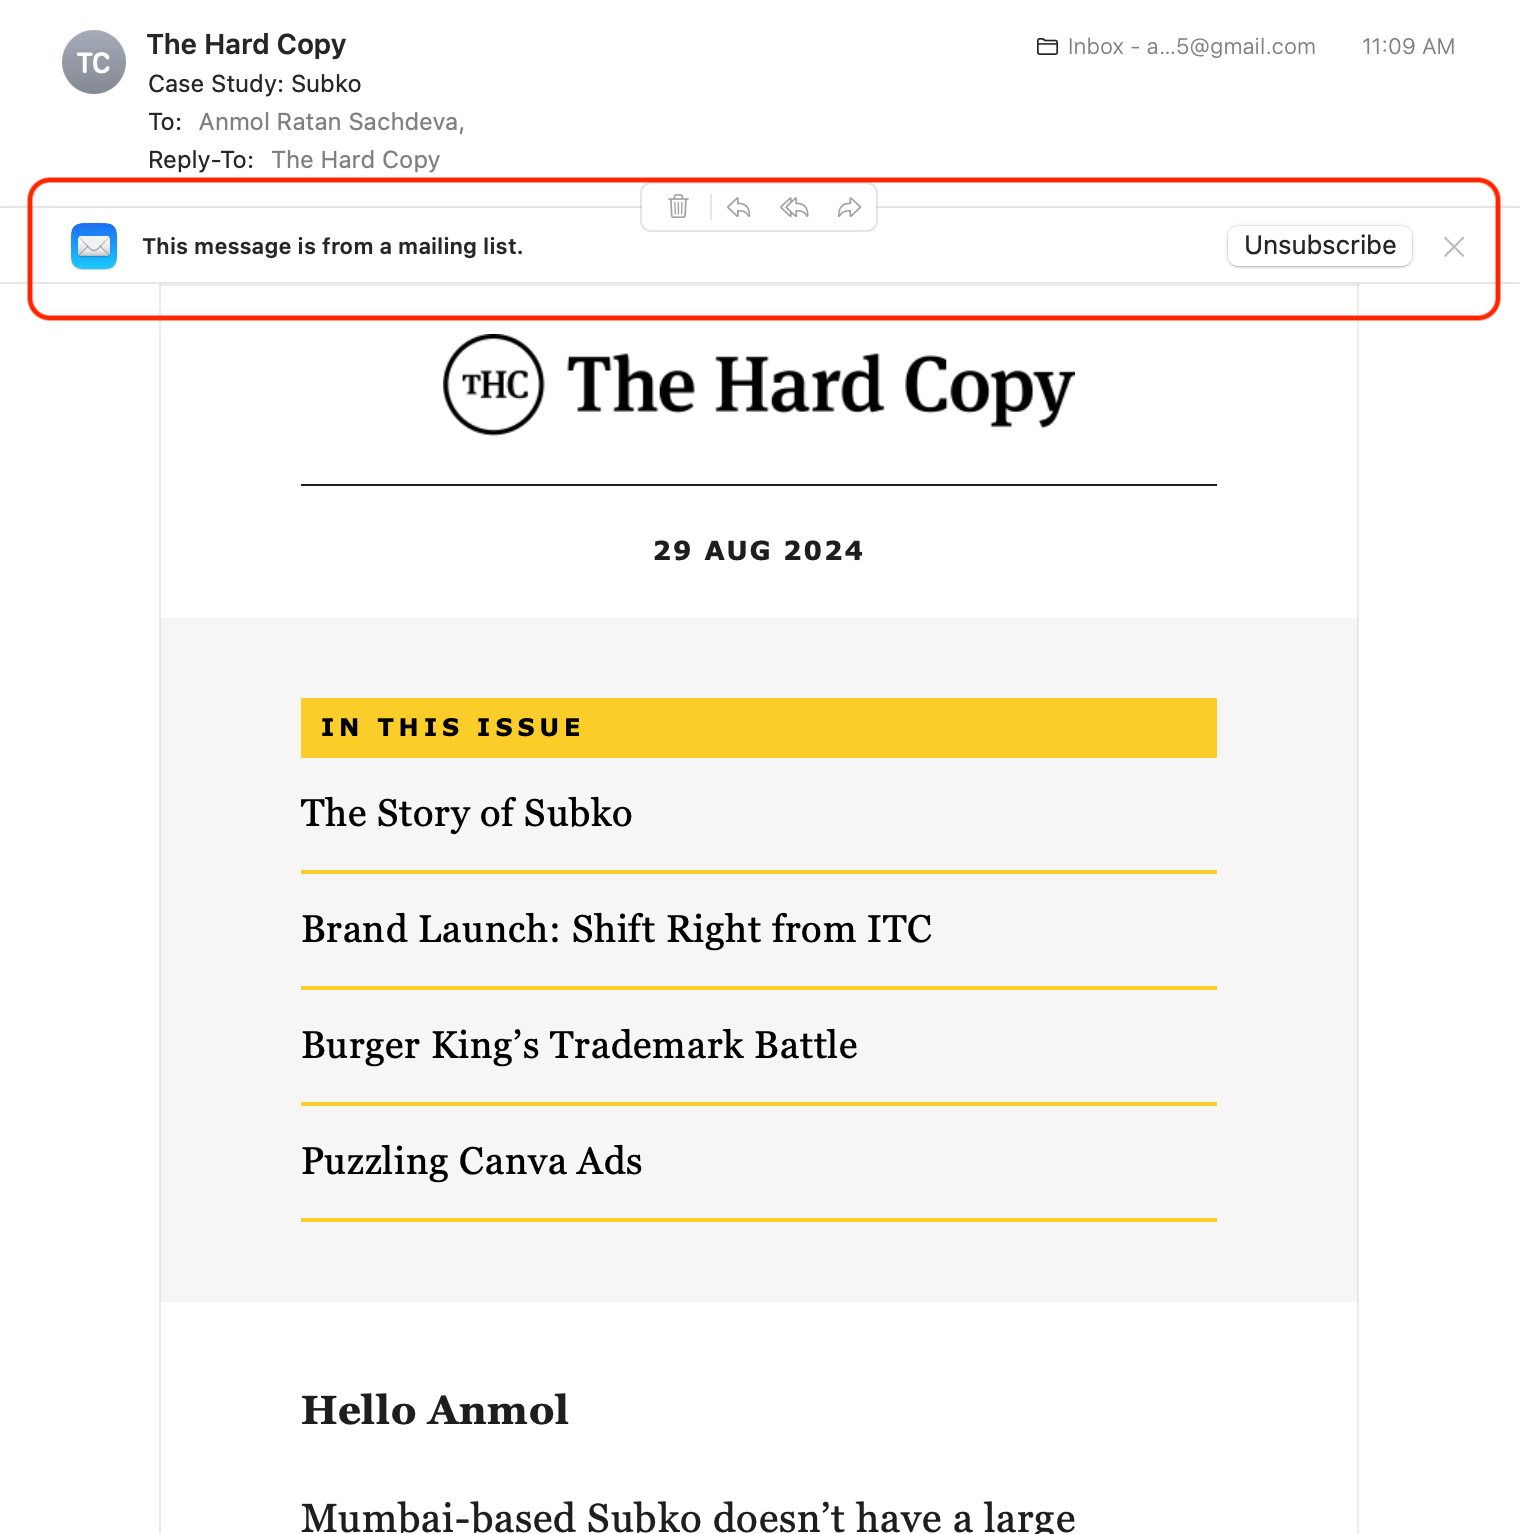
Gmail
As shared before, the list-unsubscribe header appears like a clickable button beside the sender info in Gmail. Here’s how it looks:
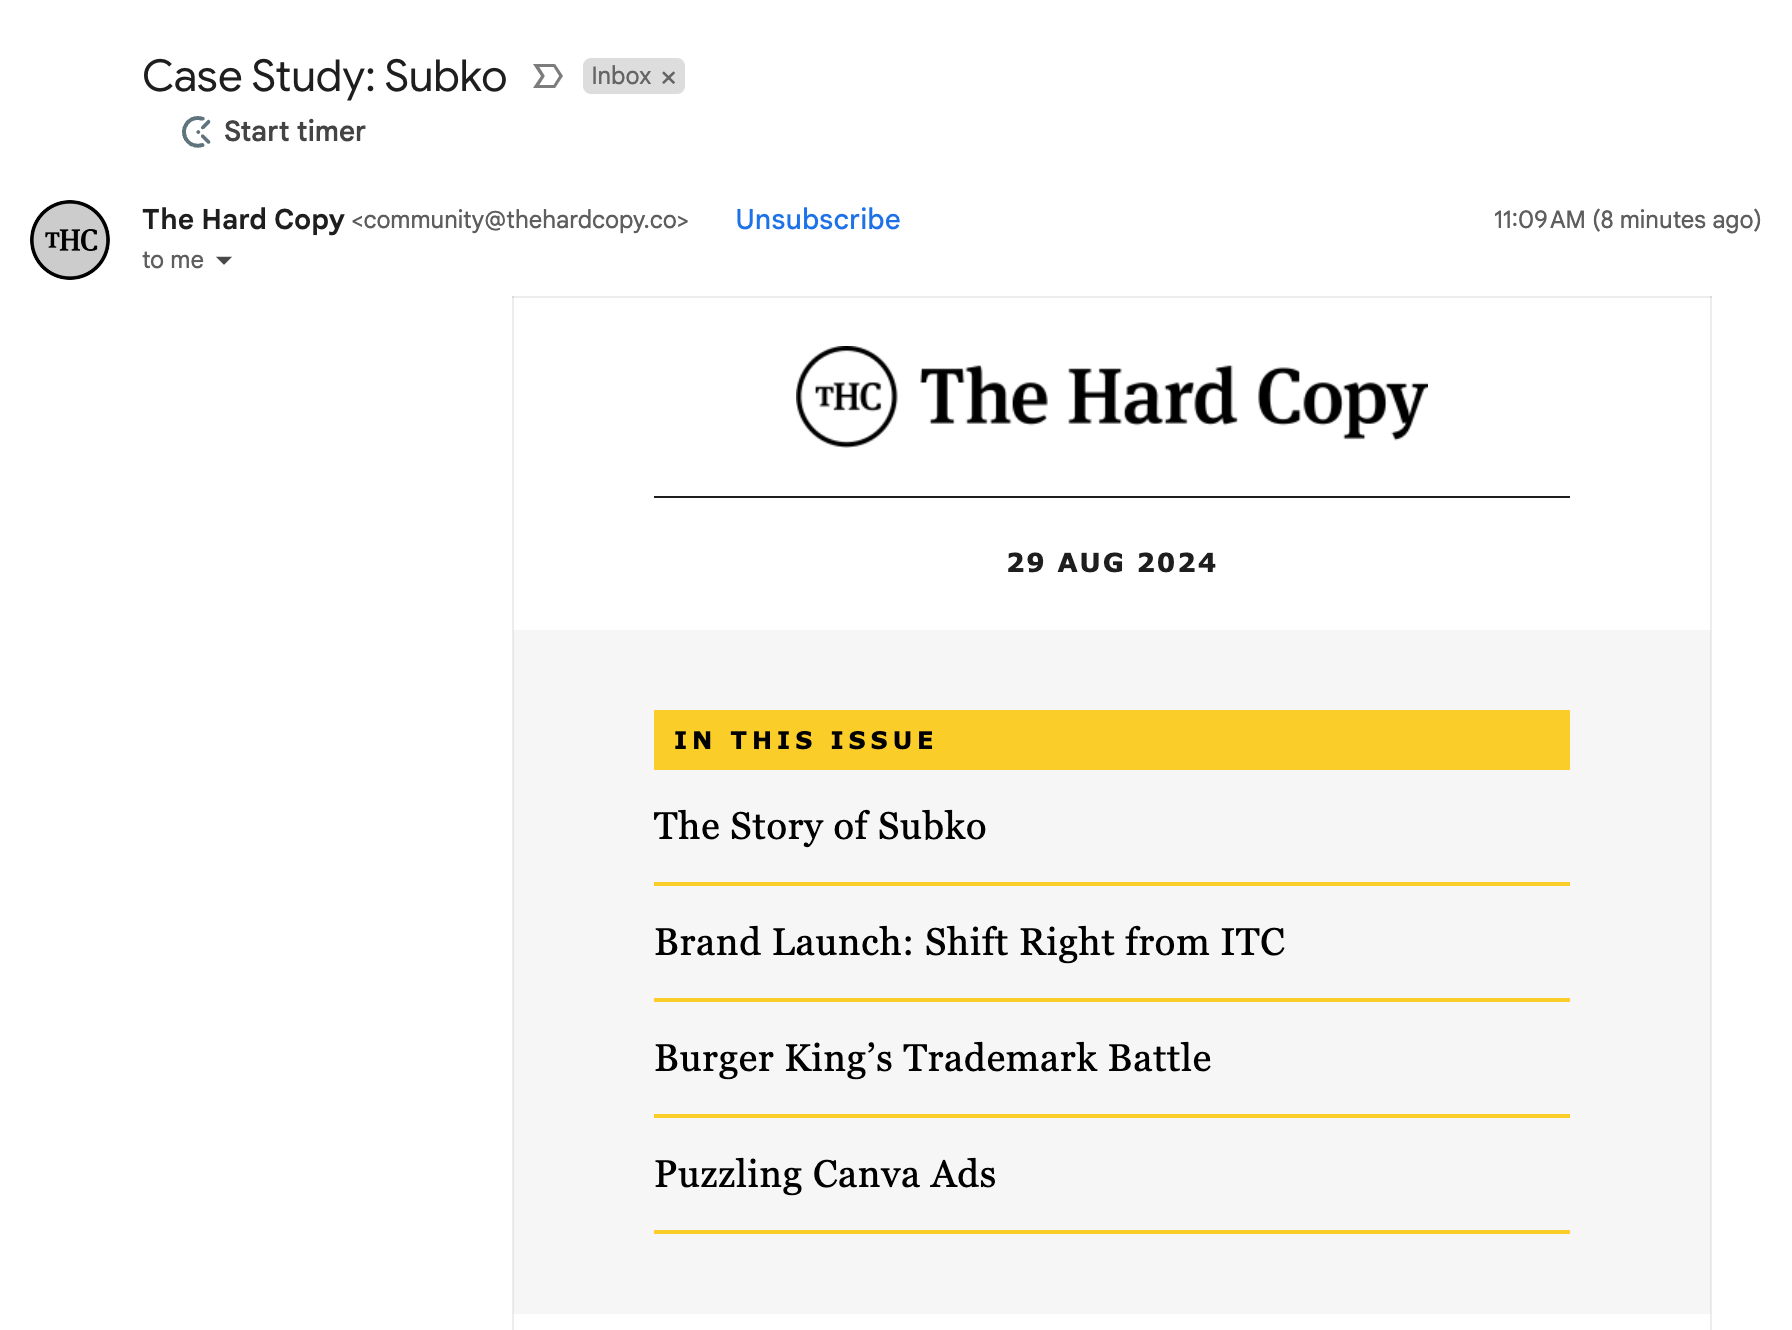
Depending on how the header is implemented, when you click it, a popup will appear, or you’ll be directed to an unsubscribe landing page.
Apple
On Apple Mail, the list-unsubscribe header can be seen right below the sender info, as below:
Clicking on the button unsubscribes you from the list.
iOS
On the iOS mail app, the header is above the sender information. Here’s an example:
Why List-Unsubscribe Header is Important?
Though inbox providers now require you to add a list-unsubscribe header for higher deliverability, there are several other reasons to implement it:
- Compliance. New email rules require you to simplify a one-click list unsubscribe for users. So, it’s a must if you want to continue reaching all your subscribers and protect your inbox placement rate;
- User experience. It offers a standardized and quick way for recipients to opt out of subscriptions irrespective of their email client;
- Reduced spam complaints. An easy unsubscribe option decreases the likelihood of recipients marking your emails as spam;
- List hygiene. It helps maintain a cleaner mailing list by speeding up the opt-out process for uninterested subscribers, improving overall engagement;
- Sender reputation.Respecting subscriber choices helps you improve the email sender reputation that improves when unsubscribes replace spam complaints — and boosts deliverability.
How Does List-Unsubscribe Header Work?
As mentioned before, the list-unsubscribe header is a code added to the email header. It is invisible to the email recipient but readable by email clients.
Generally, the code uses one of the following:
- Mailto method. Triggers an email to process an unsubscribe request;
- HTTP/HTTPS URL method. Opens an unsubscribe URL that processes the unsubscribe request.
All email clients support the list-unsubscribe header. You can set the list of unsubscribe post headers by adding a few lines of code to the header of all outgoing emails.
Implementing the List-Unsubscribe Header
Email clients like Google & Yahoo have different expectations and requirements to comply. Mostly, you need to add two lines of code in all outgoing mails. Here’s the basic code for setting up a list-unsubscribe header.
- List-unsubscribe post: List-Unsubscribe=One-Click;
- List-unsubscribe: <https://domain.com/unsubscribe/example>
When implemented correctly, the code displays an unsubscribe option beside the sender information. When the recipient clicks this option, the email client either:
- Asks for a confirmation to unsubscribe or;
- Redirects the user to a URL for managing preferences/unsubscribe.
For Sender users, Sender’s high-deliverability infrastructure with one-click unsubscribe handled automatically generates and inserts the RFC 8058 headers in every send — no manual code edits required, no platform configuration.
Best Practices for Managing Unsubscribe Requests
It’s easy to set up a list-unsubscribe header by following the instructions above. But do you know how to deal with all the unsubscribe requests coming your way?
Here are some best practices:
Provide Clear Opt-Out Option
Having a list-unsubscribe option in the header is the easiest way. You can revisit the previous sections on how to do so for your email. Apart from that, you can add an unsubscribe link in the footer. Always use simple language for opt-out buttons.
Acknowledge Unsubscribe Requests Promptly
Though the CAN-SPAM Act requires processing all unsubscribe requests within ten business days, you must implement real-time unsubscribe functionality for improved user experience.
Here’s what you should do:
- Set up an automated system for removing subscribers from mailing;
- Develop a system to log and timestamp all unsubscribe requests for future reference.
The email list cleaning workflow that turns unsubscribes into clean ongoing operations covers the 7-step process — automated bounce handling, engagement segmentation, and the audit trail — that turns ad-hoc unsubscribe handling into compliant infrastructure.
Ensure Compliance with Legal Requirements
The CAN-SPAM Act, GDPR, and other relevant laws require you to follow specific instructions for unsubscribed contacts. For Sender users, how Sender handles CAN-SPAM and GDPR unsubscribe compliance documents the platform-level handling that turns these regulatory requirements into automated processing. The rules mainly cover how you’ll dispose of user information, how many days you have to process requests, etc.
Regularly audit your unsubscribe process to ensure ongoing compliance. Here are some best practices:
- Establish a process for handling unsubscribe & data access requests;
- Set up automated reminders for periodic compliance reviews;
Monitor and Analyze Unsubscribe Rates
Track unsubscribe rates across different campaigns and segments. Identify patterns or spikes in unsubscribes. Then, use this data to refine your email strategy and content to reduce future unsubscribes.
Here are some good practices:
- Segment unsubscribes by user demographics and engagement history;
- Set up alerts for unusual spikes in unsubscribe rates;
- Correlate unsubscribe rates with specific content or send times;
- Set up an exit survey with predefined reasons for unsubscribing.
Avoid Unnecessary Follow-Up After Unsubscribing
Respect the user’s decision by immediately ceasing all marketing communications. If confirmation is necessary, send a brief email.
Don’t use this as an opportunity for re-engagement or to promote other services. Instead, you should design a minimal, distraction-free unsubscribe confirmation page or email. Also, remember to share alternative communication channels (e.g., social media) in your last email.